
Managed Auth - Recovering a Pay account
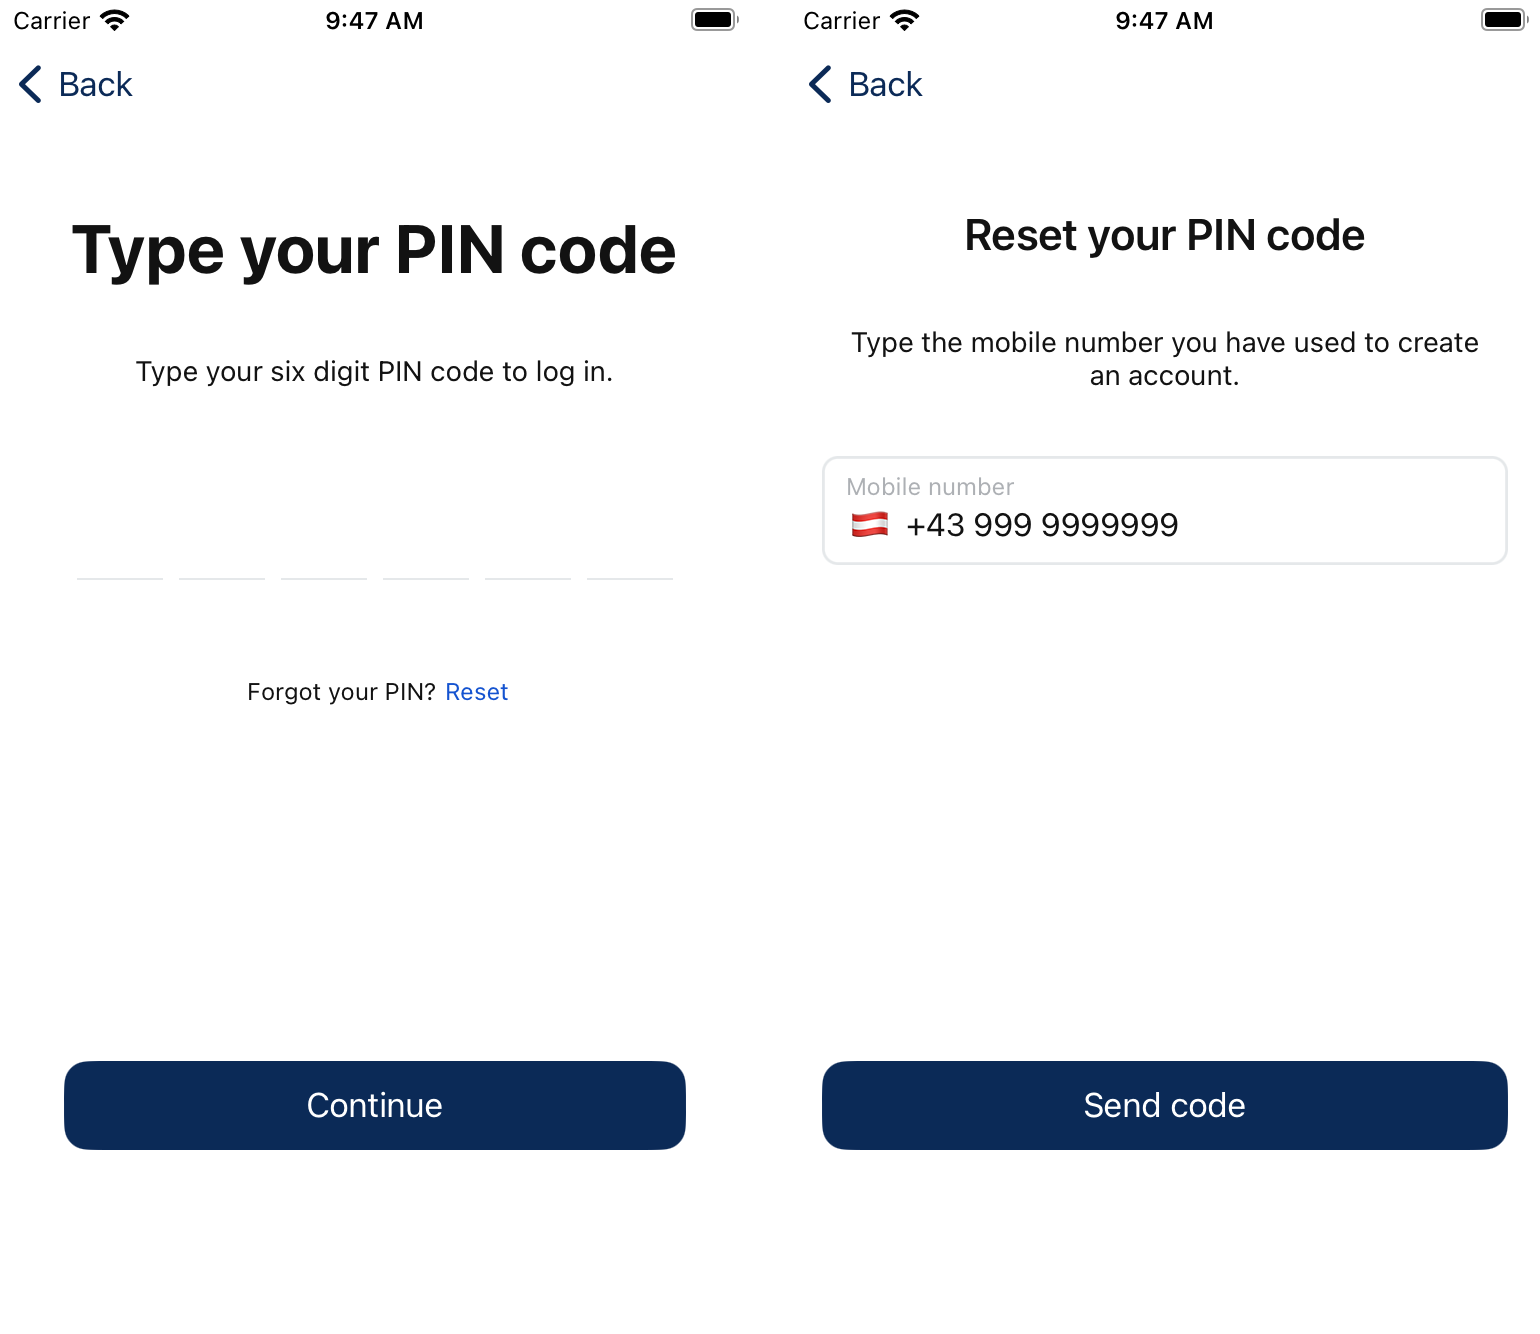
In case you forgot the passcode of your Pay user, you can also use the SDK to recover your account. There are three steps:
1. Starting the flow
It's a simple call to start the flow in the background. The backend receives the phone number it should send the OTP verification to and will reply with the flow identifier you will need to use in follow-up calls.
var phoneNumber : String = "+431234567"
let request = StartRecoveryRequest(phoneNumber: phoneNumber)
vipasoPay.user.startRecoveryFlow(request: request) { result in
    switch result {
    case .success(let response):
      	print("success")
      	// save flow id from response.flowID for the upcoming step
    case .failure(let error):
        print("error: \(error.localizedDescription)")
    }
}
val request = StartRecoveryRequest(phoneNumber = phoneNumber)
return vipasoWrapper.vipasoPay.startRecoveryFlow(request)If you debug your networking calls, you should see the following traffic:
HTTP request and response for sending the OTP code and receiving the flow identifier.
POST /identity/recovery HTTP/1.1
Content-Type: application/json
{
  "identifier": "+439999999999"
}
HTTP/1.1 201 Created
Content-Type: application/json;charset=UTF-8
{
"flowId": "be204c4a-e10e-4124-9b2e-c4b81c867cce",
"expiresAt": "2024-11-27T09:05:03.517896776Z"
}Example screenshots from our development application:
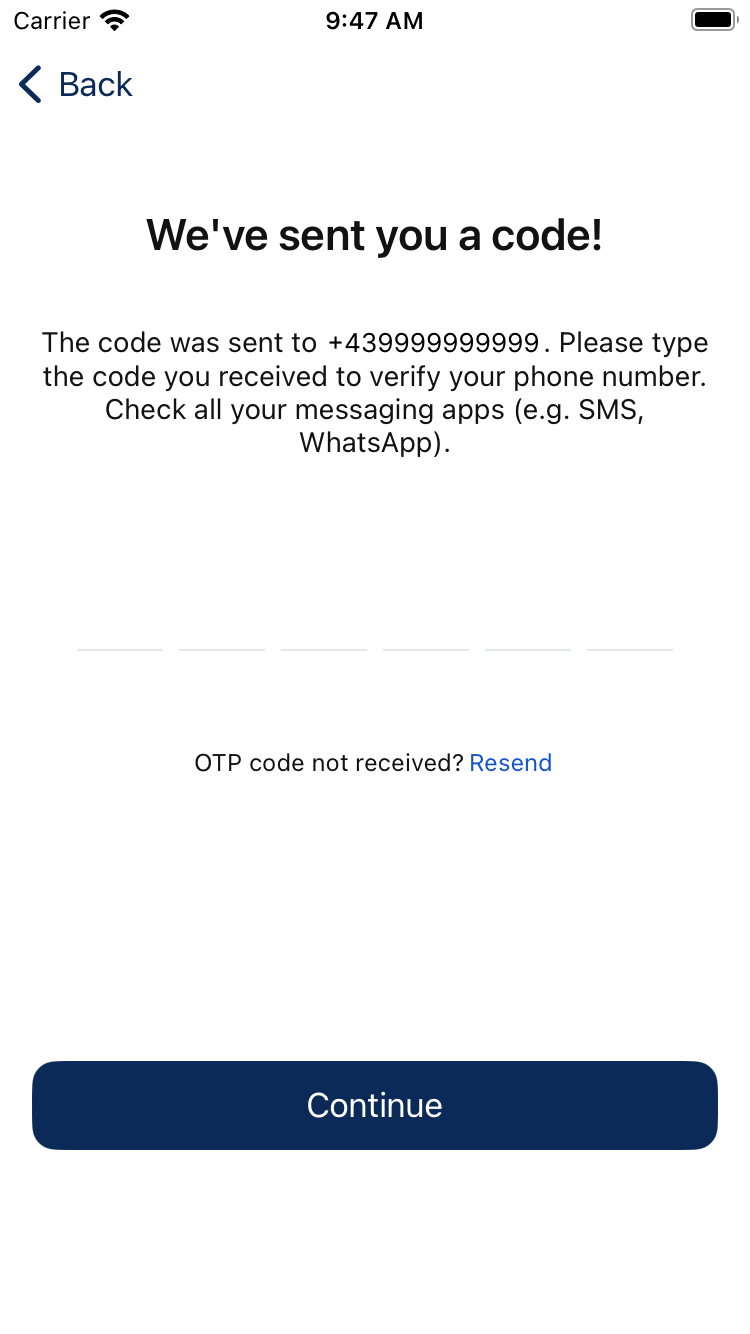
2. Verifying your phone number
In the second step, the client side sends the OTP code with the flow id and will switch flow from authentication to settings. This means that after this request the returned flow id has to be used for the upcoming calls.
let request = RecoveryOTPRequest(
  	code: code, // the received OTP code
	  flowID: flowID // the flowID from the previous step
)

vipasoPay.user.sendRecoveryOTP(request: request) { result in
	switch result {
    case .success(let response):
    	print("success")
	    // save the new settingsFlowID from response.settingsFlowID for the upcoming step
	    // save the new sessionToken from response.sessionToken for the upcoming step
    case .failure(let error):
        print("error: \(error.localizedDescription)")
  }
}
return vipasoWrapper.vipasoPay.sendRecoveryOtp(flowId = flowId, code = code)If you debug your networking calls, you should see the following traffic. Don't be surprised if you see a 422 error, it's used like this on purpose to get the CSRF token. Again, all the overhead is luckily hidden by the SDK APIs.
POST /a/self-service/recovery?flow=be204c4a-e10e-4124-9b2e-c4b81c867cce HTTP/1.1
Content-Type: application/json
{
  "method": "code",
  "code": "999999"
}
HTTP/1.1 200 OK
...
{
"id": "ABCD1234-AB12-CD34-EF56-ABCDEF123456",
"type": "api",
...
"continue_with": [
...
"action": "show_settings_ui",
"flow": {
"id": "1234ABCD-12AB-34CD-56EF-123456ABCDEF",
...
}
}
],
"transient_payload": {}
}Example screenshots from our development application:
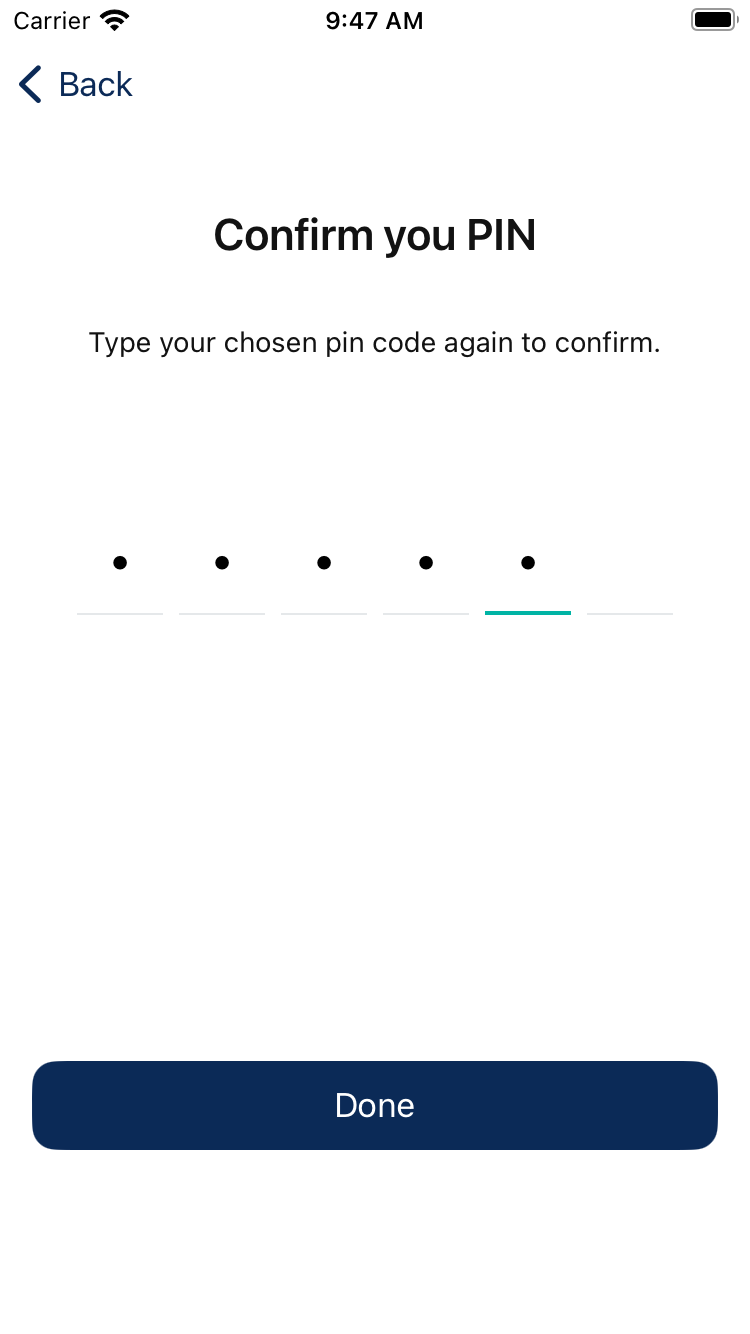
3. Setting the new passcode
The last step is update your passcode. You will need to send the received CSRF token and the new passcode to the received settings flow id. It's important to note that the SDK does not automatically authenticate you again. This is to let you implement your user experience the way you prefer. Once you got a success response, you can navigate your users to the login screen for example.
let request = FinishRecoveryRequest(
  settingsFlowID: settingsFlowID, // the settingsFlowID from the previous step (IMPORTANT: not the one from the first step)
  sessionToken: sessionToken, // the sessionToken from the previous step
  password: password // the new password entered by the user
)

vipasoPay.user.finishRecoveryFlow(request: request) { result in
	switch result {
    case .success(let response):
    	print("success")
    case .failure(let error):
        print("error: \(error.localizedDescription)")
  }
}
val request = FinishRecoveryRequest(settingsFlowId, csrfValue, password)
return vipasoWrapper.vipasoPay.finishRecoveryFlow(request)If you debug your networking calls, you should see the following traffic:
POST /a/self-service/settings?flow=6726b579-706a-4ebe-8742-6cd3cb73472d HTTP/1.1
Content-Type: application/json
{
  "csrf_token": "80PqKCzku/7g46kof5REfxeC8PdWuYwZfOxY8xESZXg=",
  "method": "password",
  "password": "111111"
}
HTTP/1.1 200 OK
Content-Type: application/json; charset=utf-8
{
...
}Example screenshots from our development application:
Updated 7 days ago