
Online Payment
Arguably the most important feature of the SDK is to execute payments between the POS and Pay apps over BLE. In the payment use case, in order to make a successful payment, you will need:
- A logged-in POS user (merchant)
- A logged-in Pay user (customer) with at least one valid instrument
The flow is the following:
- The Pay side starts advertising via BLE and listens for payment related events.
- The POS side creates a new payment instance starts scanning over BLE. Upon connection it exchanges information with the Pay side
- When the initial information exchange is complete the POS side sends payment request which can be either accepted or cancelled by the payee.
- Upon accept the Pay side sends the acceptance to the POS side
- Lastly both sides execute the payment with the backend and can react to success or error states separately
- If any of the sides are offline then the online side sends the result to the offline side and they finish the payment according to the results.
- If both sides are offline then either the payment fails or if the Pay side has a pre authorized instrument then that is used to cover the payment. (See: Offline Payment). Please note that offline payment is an experimental feature.
Let's check each step in more detail.
Pay: Receiving Payments
The flow has two steps. You need to connect to the POS side via BLE and register as a payment receiver to be notified about any payment requests coming from POS.
It is important to emphasize that the callback closure yields more events to it is not a single use callback. This means that it can receive more payments while it is active. Keep this closure alive while you'd like to receive payments.
The usual flow of these events for a payment looks like:
receivedPaymentfinishedPaymentwhen the payment is concluded with success
alternate payment outcomes:cancelledin case the payment is cancelled by either side this indicates the end of a paymenterrorin case a payment or an established payment connection failsotherPaidin case the received payment was paid by another payee
disconnectedwhen the connection is closed
vipasoPay.payment.listenForBLEPayments { paymentEvent in
	switch paymentEvent {
  	case .cancelled:
    	// Handle the cancellation
    	self?.handlePaymentCancellation()
    case .error(let error):
    	// Handle the error case
    	self?.handlePaymentError(error)
    case .finishedPayment(let paymentResult):
    	// Handle the case the payment is finished
    	self?.handleFinishedPayment()
    case .receivedPayment(let paymentRequest):
    	// display payment for the user
    	self?.handlePayment(paymentRequest: paymentRequest)
    case .otherPaid:
    	// Handle the case if another wallet paid the payment
    	self?.handleOtherPayment()
    case .disconnected:
    	// Handle the case if another wallet paid the payment
    	self?.handleDisconnected()
    }
  }
}
Example screenshots from our development application:

POS: Requesting Payments
In this case the POS generates an UUIDv7 paymentID and wraps it in a payment request object along with the merchant identifiers, the amount, the currency of the payment and a creation date.
let paymentRequest = VipasoPaymentRequest(
paymentID: paymentID,
merchantID: merchantID,
operatorID: operatorID,
merchantName: merchantName,
amount: amount,
currency: currency,
createdAt: Date().iso8601String
)
vipasoPOS.payment.requestPaymentViaBLE(request: paymentRequest) { [weak self] result in
switch result {
case .success(let response):
self?.handlePaymentResponse(response)
case .failure(let error):
self?.handlePaymentError(error)
}
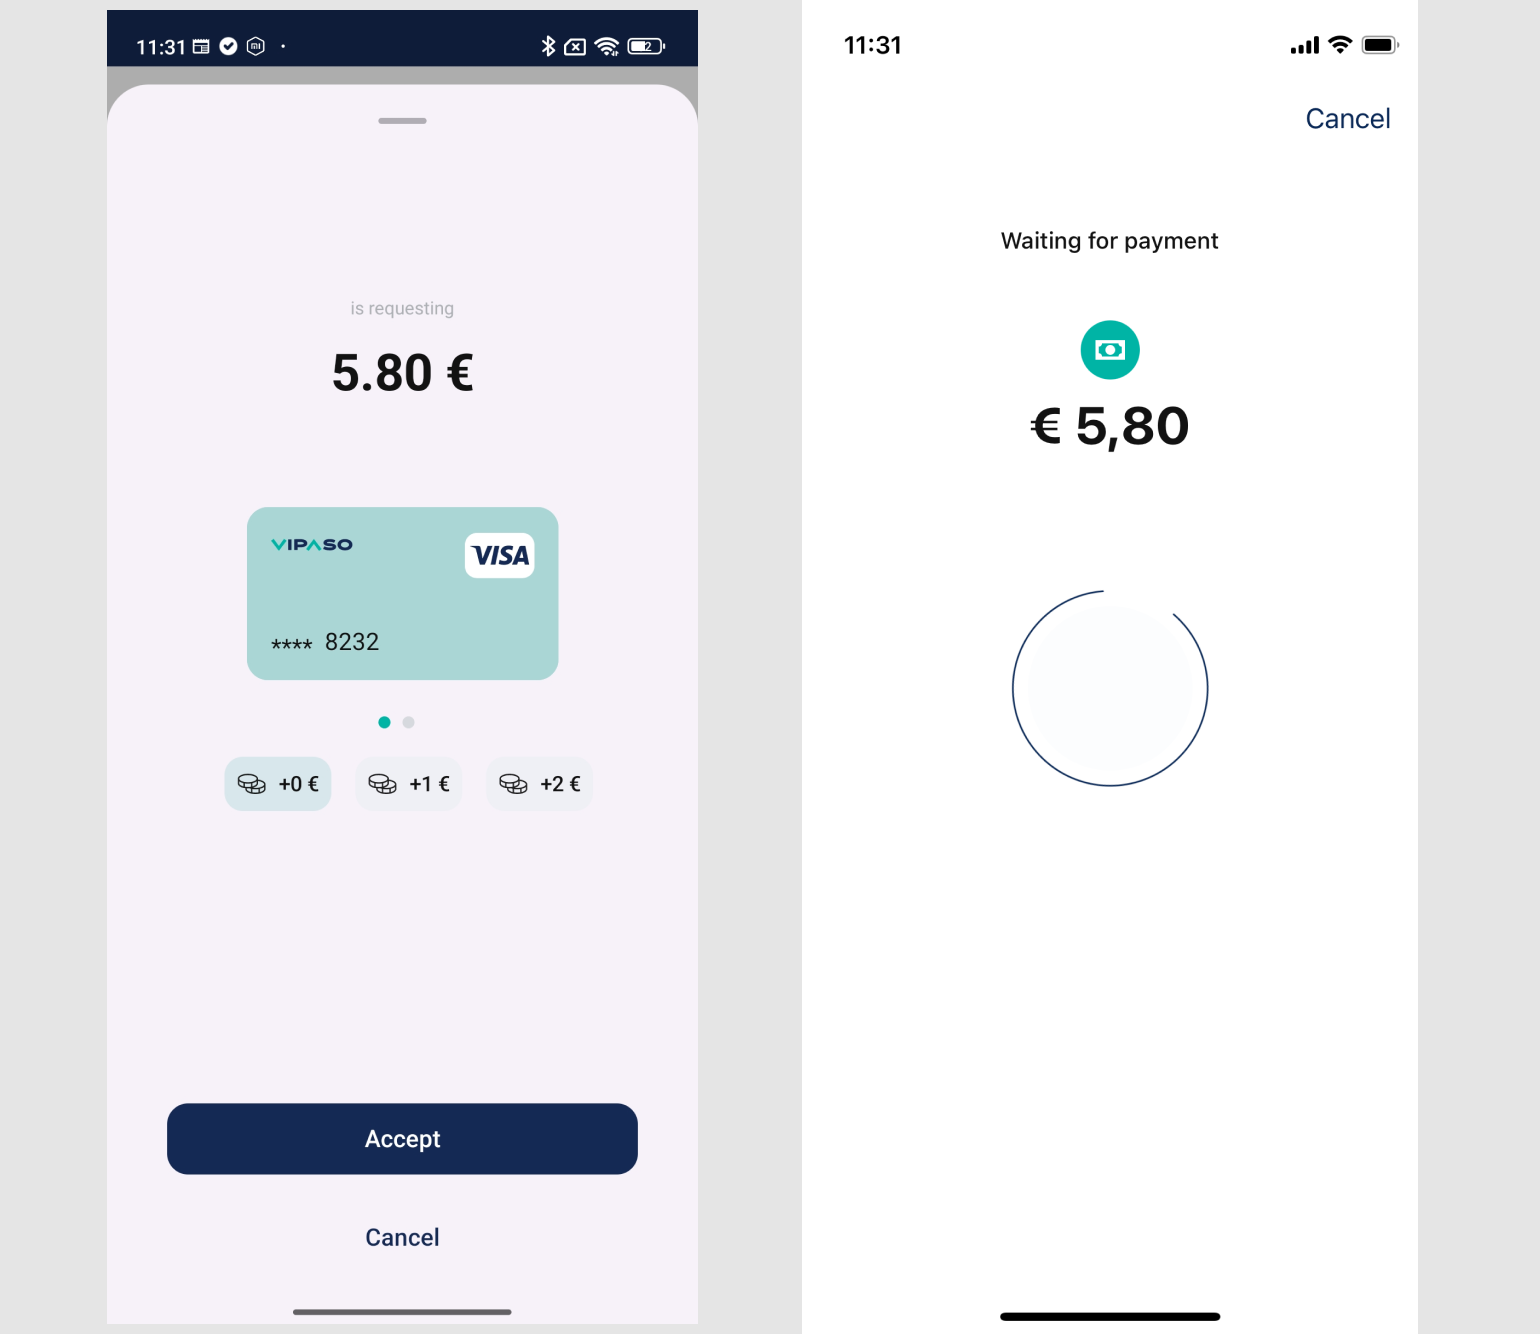
}Accepting the Payment
After the user has reviewed the payment details and selected a payment instrument, they can accept and execute the payment:
let response = VipasoPayPaymentResponse(
	paymentID: paymentID,
	amount: amount,
  tip: tip,
  currency: currency,
  instrumentID: instrumentID,
  createdAt: Date().iso8601String
)

vipasoPay.payment.acceptPayment(response: response) { [weak self] result in
	switch result {
  	case .success(let response):
    	self?.handleAcceptanceSuccess(response)
    case .failure(let error):
    	self?.handleAcceptanceFailure(error)
  }
}
Example screenshots from our development application:
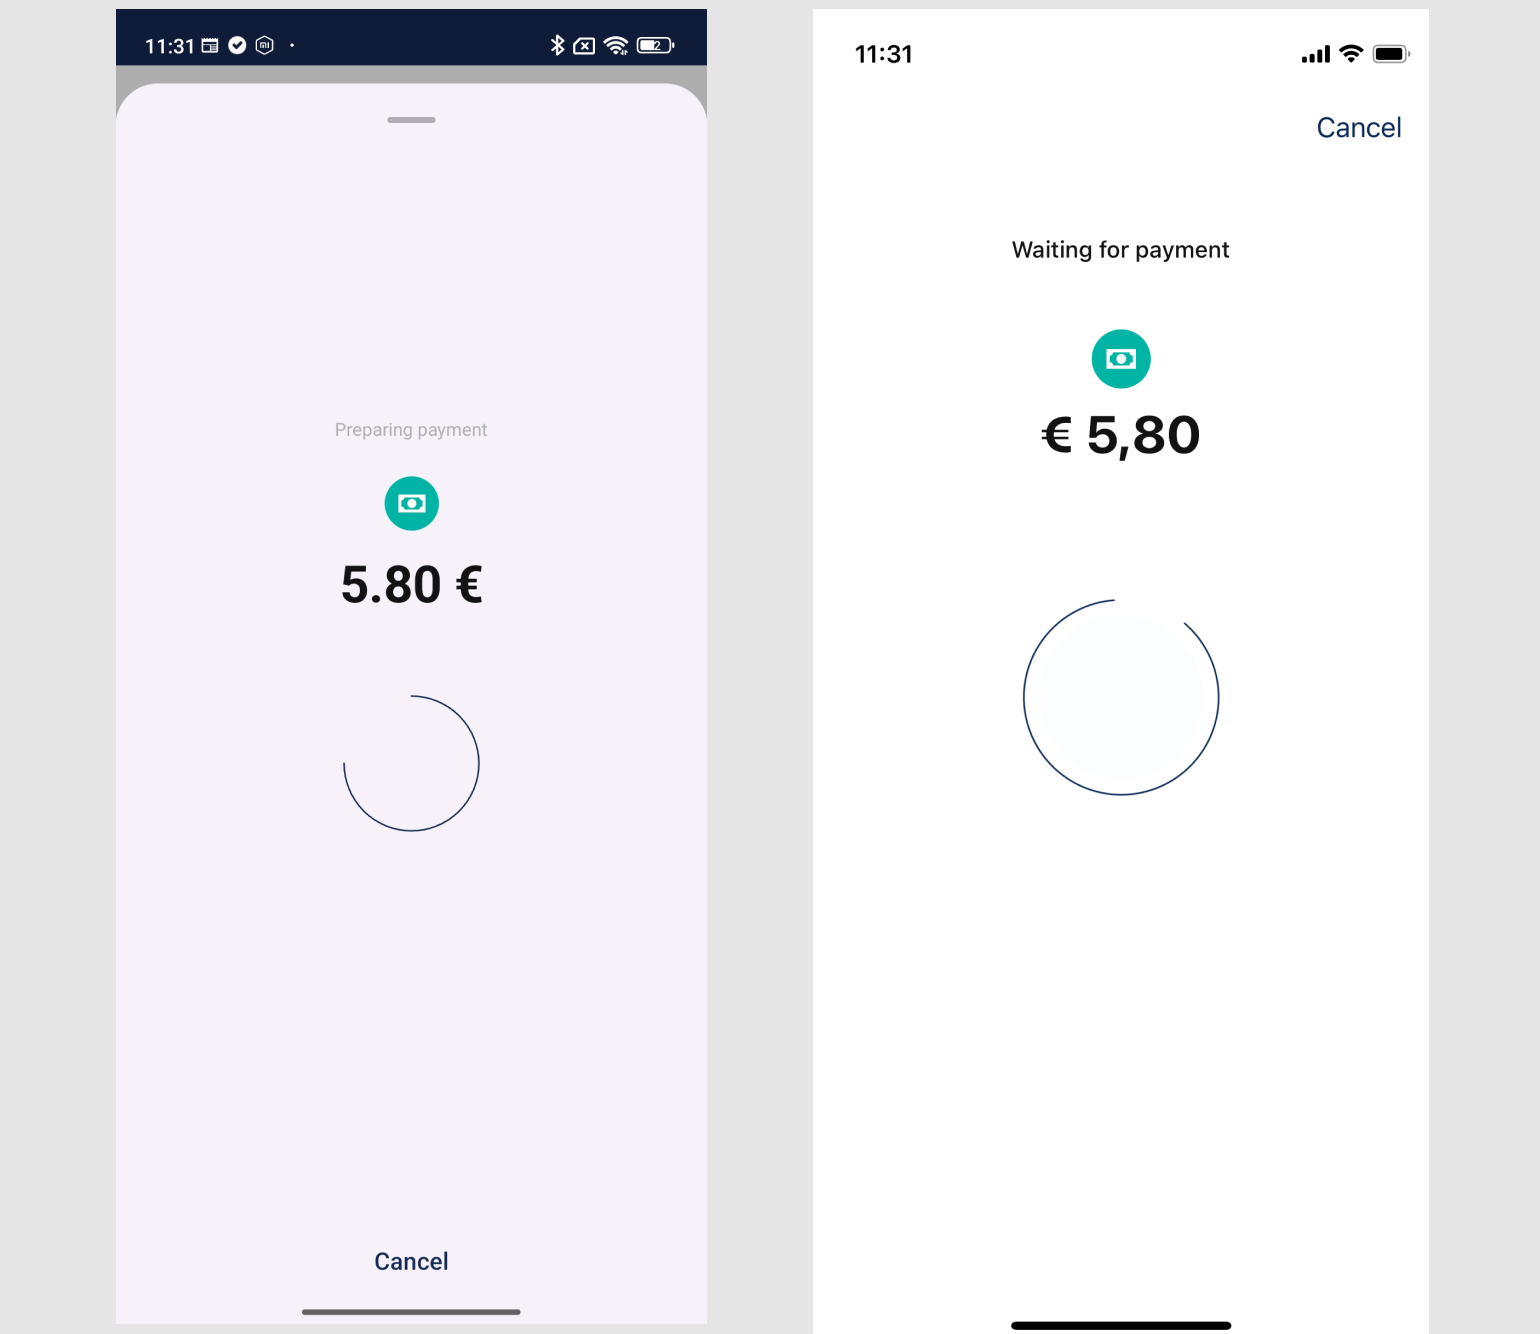
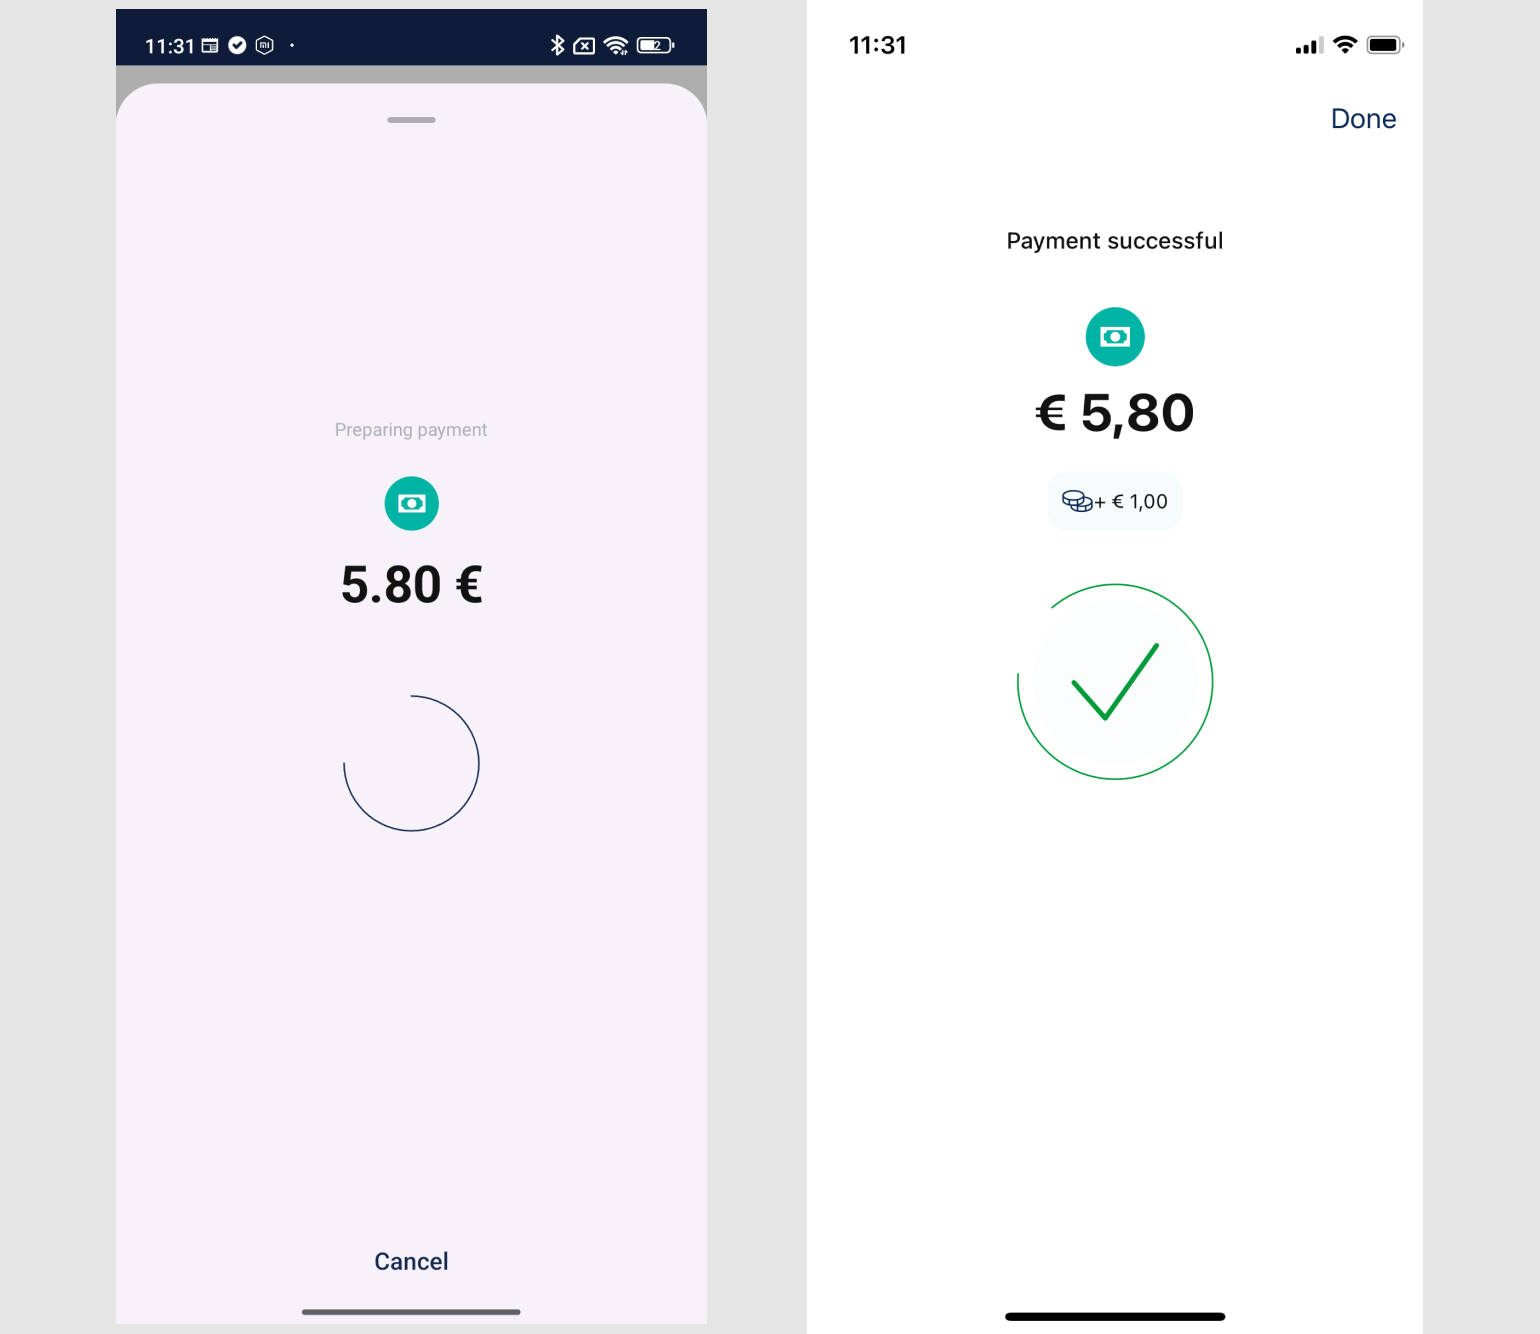
Pay: Executing Payment
When the payment ID arrived successfully on the Pay side, you can fetch its details and display a screen to the user where they can select the instrument they want to pay with and an optional tip.
Example screenshots from our development application:
Cancelling the payment
Pay side cancellation:
With this call the Pay side indicates to the POS that the it does not pay the received payment. IMPORTANT: When this call succeeds the Pay side will not receive this payment from the POS side anymore.
vipasoPay.payment.cancelPayment(paymentID: paymentID) { [weak self] result in
  switch result {
    case .success(let response):
			self?.handleCancellationSuccess(response)
    case .failure(let error):
			self?.handleCancellationFailure(error)
  }
}
POS side cancellation:
With this call the POS side indicates to all the connected Pay sides that it cancels the payment so they can not pay it anymore. IMPORTANT: This is a fire and forget call.
vipasoWrapper?.vipasoPOS?.payment.cancelPayment(paymentID: paymentID)Stop Receiving Payments
When you no longer need to receive payments, you can stop the payment reception:
vipasoPay.payment.stopBle()Updated 6 days ago