
Online Payment
Vipaso Pay SDK allows you to execute payments between POS and Pay apps over BLE. To make a successful payment, you will need: - A logged-in POS user (merchant) - A logged-in Pay user (customer) with at least one valid payment instrument
Overview
The flow is the following:
- The Pay Side starts receiving payments via BLE and listens for payment related events.
- The POS Side creates a new payment instance and starts requesting payments via BLE. Upon connection, it exchanges information with the Pay Side.
- When the initial information exchange is complete, the POS Side sends a payment request which can be either accepted or cancelled by the payment.
- Upon acceptance, the Pay Side sends the acceptance to the POS Side.
- Lastly, both sides execute the payment with the backend and can react to success or error states separately.
- If any of the sides are offline then the online side sends the result to the offline side and they finish the payment according to the results.
- If both side are offline (no internet connection), then please check out Offline Payment Use Case for details.
Let's check each step in more detail.
Payment Setup
Pay Side: Receiving Payments
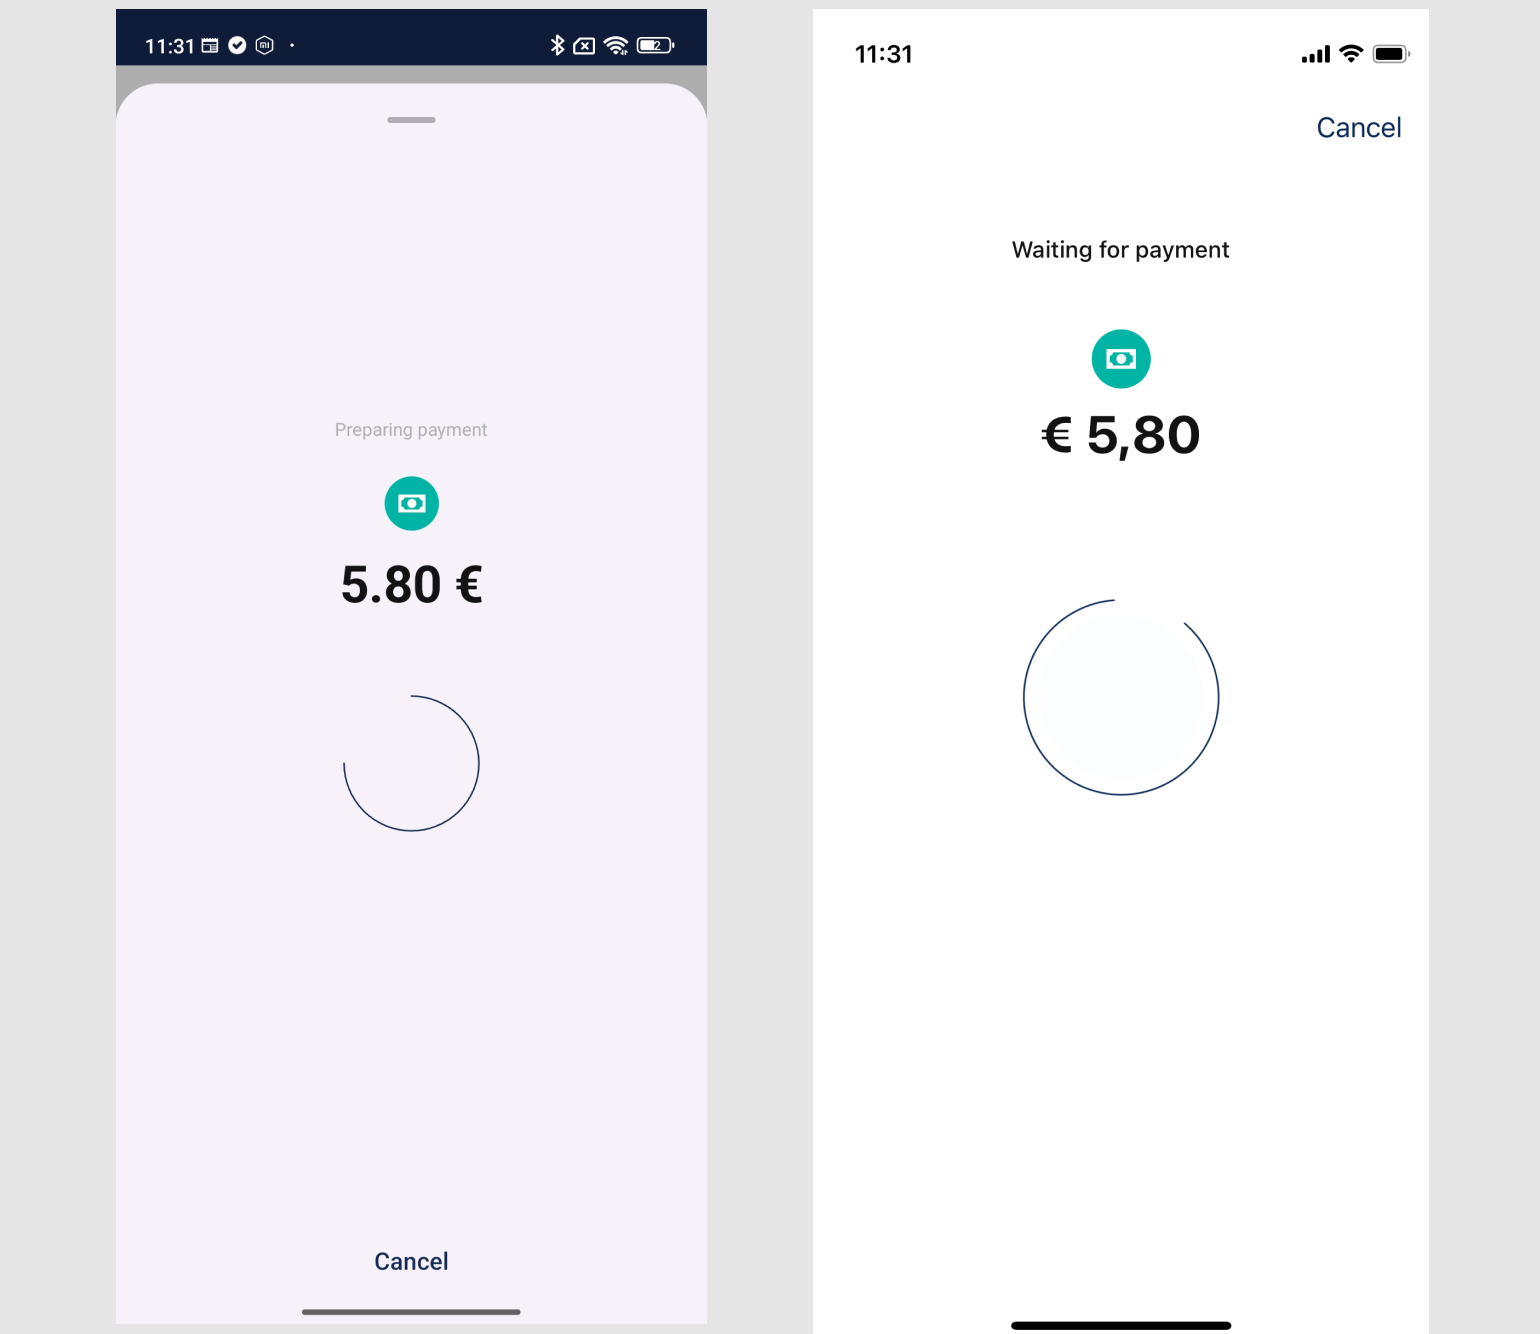
The first step for the Pay app is to start receiving payments via BLE and listen for incoming payment requests. The SDK will handle the BLE communication and connection establishment in the background.
// Start listening for BLE payments
try {
    vipasoPay.payment.listenForBlePayments().collect { paymentState ->
        when (paymentState) {
            is VipasoWalletPaymentState.ReceivedPaymentRequest -> {
                // Payment request received from a POS
                val paymentRequest = paymentState.paymentRequest
                // Display payment details to the user
                handlePaymentRequest(paymentRequest)
            }
            is VipasoWalletPaymentState.PaymentSuccessful -> {
                // Payment was successful
                handleSuccessfulPayment(paymentState.paymentId)
            }
            is VipasoWalletPaymentState.PaymentCancelled -> {
                // Payment was cancelled by either side
                handleCancelledPayment(paymentState.paymentId)
            }
            is VipasoWalletPaymentState.AnotherUserPaid -> {
                // Payment was paid by another wallet
                handleOtherUserPaid(paymentState.paymentId)
            }
            is VipasoWalletPaymentState.PaymentFailed -> {
                // Payment failed
                handleFailedPayment(paymentState.paymentId, paymentState.error)
            }
        }
    }
} catch (e: Throwable) {
    // Handle errors when starting BLE advertisement
    Log.e("BlePayment", "Error listening for BLE payments: ${e.message}")
}
Example screenshots from our development application:

POS Side: Requesting Payments
In this step, the POS side create a payment request with merchant details, amount, and currency. The SDK will send the request to nearby Pay devices (via BLE) which are ready to receive payments.
// Request a payment via BLE
try {
val paymentResult = vipasoPos.payment.requestPaymentViaBle(
amount = "25.50",
currency = "USD",
merchantId = "merchant-123",
operatorId = "operator-456"
)
// Process the payment result based on its type
when (paymentResult) {
is VipasoPosPaymentResult.PaymentSuccessful -> {
// Payment was successfully processed
val amount = paymentResult.amount
val tip = paymentResult.tip
val currency = paymentResult.currency
val paymentId = paymentResult.paymentId
// Update UI with successful payment
displayPaymentSuccess(amount, tip, currency, paymentId)
}
is VipasoPosPaymentResult.PaymentCancelled -> {
// Payment was cancelled by the operator or payer
val paymentId = paymentResult.paymentId
// Update UI to show payment was cancelled
displayPaymentCancelled(paymentId)
}
is VipasoPosPaymentResult.PaymentFailed -> {
// Payment processing failed
val paymentId = paymentResult.paymentId
val error = paymentResult.error
// Handle payment failure, display error message
displayPaymentError(paymentId, error)
}
}
} catch (e: Exception) {
// Handle exceptions during payment initialization
Log.e("BlePayment", "Failed to initiate payment", e)
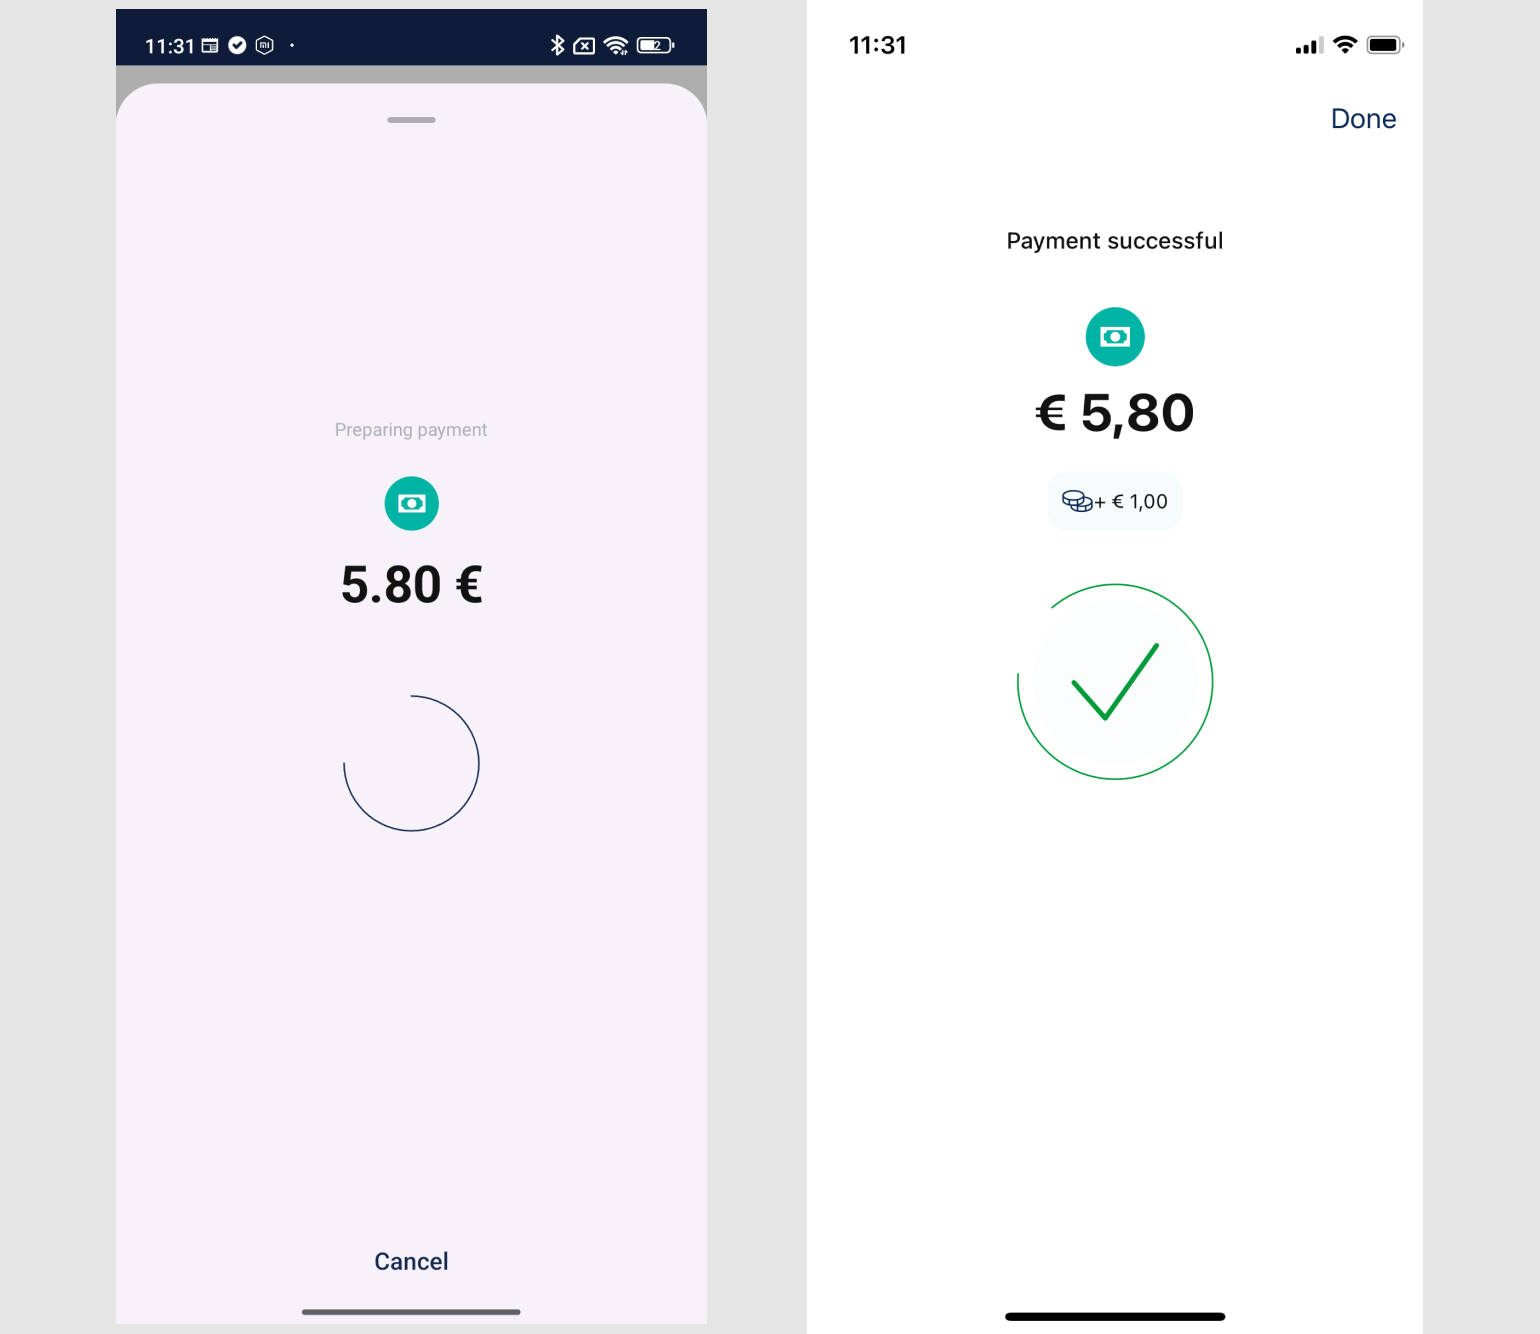
}Example screenshots from our development application:
Payment Processing
Pay Side: Accepting the Payment
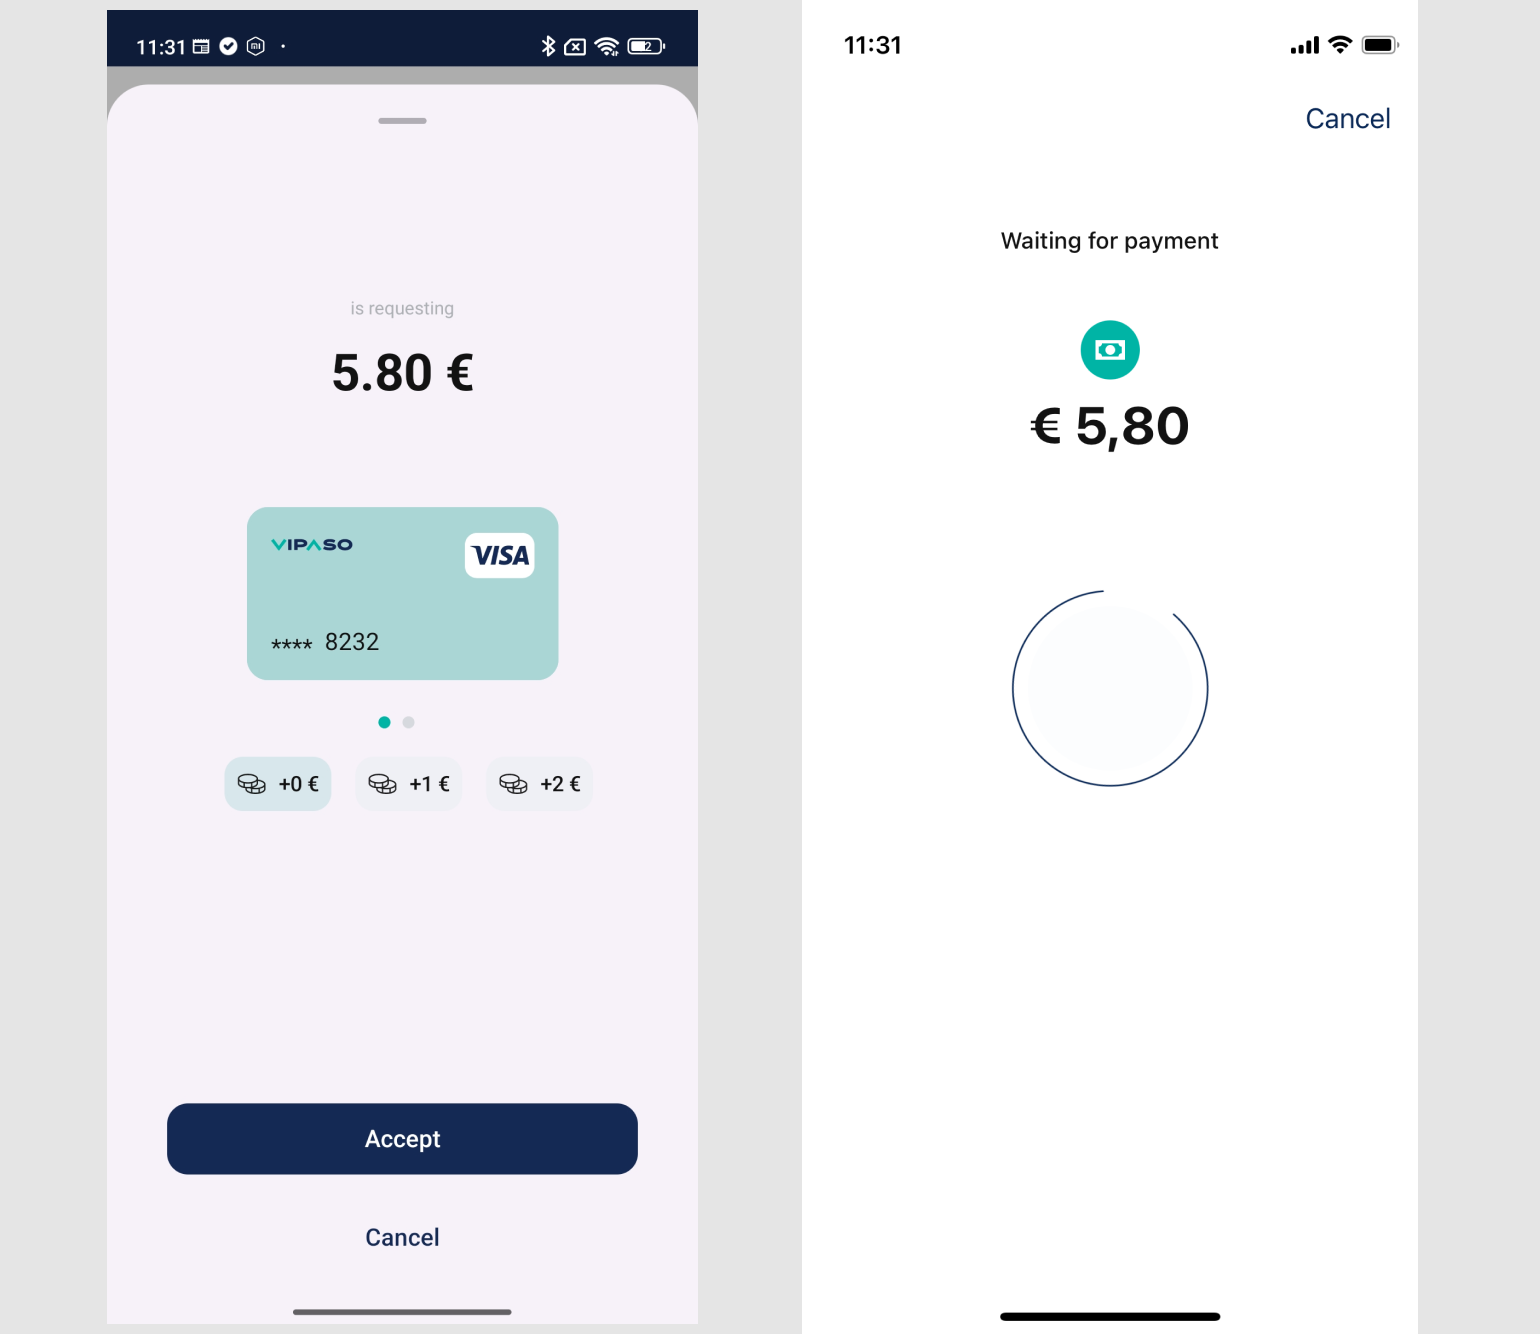
After the user has reviewed the payment details and selected a payment instrument, they can accept and execute the payment:
// Create a payment response with the selected instrument
try {
    // First fetch available payment instruments
    val instruments = vipasoPay.instrument.fetchInstruments()

    // Let the user select an instrument or use the default
    val selectedInstrument = instruments.instruments.first { it.isDefault }

    // Accept the payment with the selected instrument
    vipasoPay.payment.acceptPayment(
        paymentId = paymentId,
        amount = amount,
        instrumentId = selectedInstrument.id,
        tip = tipAmount, // Optional tip amount
        currency = currency
    )

    // The payment state will be updated through the listenForBlePayments flow
} catch (e: Throwable) {
    // Handle errors accepting the payment
    Log.e("BlePayment", "Error accepting payment: ${e.message}")
}
Example screenshots from our development application:
Cancelling the Payment
Pay Side Cancellation:
The Pay user can reject or cancel a received payment request. When this happens, this Pay user will not be able to pay this specific payment again.
// Cancel the payment
try {
    vipasoPay.payment.cancelPayment(paymentId)
    // The payment state will be updated through the listenForBlePayments flow
} catch (e: Throwable) {
    // Handle errors cancelling the payment
    Log.e("BlePayment", "Error cancelling payment: ${e.message}")
}
POS Side Cancellation:
With this call the POS side notifies all the connected Pay devices that it the Payment is cancelled so they cannot pay it anymore.
// Cancel payment on POS side
vipasoPos.payment.cancelPayment(paymentId)
// No callback needed as this is a fire and forget call
Stop Receiving Payments
When you no longer need to receive payments, you can stop the payment reception:
// Stop payment reception
try {
    vipasoPay.payment.stopBle()
    // BLE advertisement stopped successfully
} catch (e: Throwable) {
    // Handle errors stopping BLE advertisement
    Log.e("BlePayment", "Error stopping BLE: ${e.message}")
}
Updated 7 days ago