Contactless Payment
The SDK provides contactless payment functionality that enables secure payment transactions between business users and customers over BLE using a targeted tag-based approach. In the contactless payment use case, in order to make a successful payment, you will need:
- A logged-in business user
- A logged-in customer with at least one valid payment instrument
- A service tag UUID to target the specific payment terminal
The payment flow works as follows:
- Customer starts advertising via BLE with a specific tag ID and listens for payment events
- Business side creates a payment instance targeting the specific tag UUID and scans for BLE connections
- Information exchange occurs between business and customer devices once connected
- Payment request is sent by the business user and can be accepted or cancelled by the customer
- Payment acceptance is sent from the customer to the business user if approved
- Payment execution happens on both sides with the backend
Offline scenarios:
- If one side is offline, the online side handles the payment and shares results
- If both are offline, payment requires pre-authorization (experimental feature)
Let's check each step in more detail.
Customer: Receiving Contactless Payments
The customer needs to activate the contactless BLE payment stack with a specific tag ID to receive targeted payment requests. You need to connect to the business side via BLE and register as a payment receiver to be notified about any payment requests coming from the business side.
Important: The callback closure handles multiple events and can receive multiple payments while active. Keep this closure alive while you want to receive payments.
The usual flow of these events for a payment looks like:
receivedPaymentfinishedPaymentwhen the payment is concluded with success
alternate payment outcomes:cancelledin case the payment is cancelled by either side this indicates the end of a paymenterrorin case a payment or an established payment connection failsotherPaidin case the received payment was paid by another payee
disconnectedwhen the connection is closed
let tagID = UUID().uuidString // Your specific service tag identifier

vipaso.payment.customer.receiveContactlessPaymentRequest(tagID: tagID) { paymentEvent in
    switch paymentEvent {
    case .cancelled:
    	// Handle the cancellation
        self?.handlePaymentCancellation()
    case .error(let error):
    	// Handle the error case
    	self?.handlePaymentError(error)
    case .finishedPayment(let paymentResult):
    	// Handle the case the payment is finished
    	self?.handleFinishedPayment()
    case .receivedPayment(let paymentRequest):
    	// display payment for the user
    	self?.handlePayment(paymentRequest: paymentRequest)
    case .otherPaid:
    	// Handle the case if another wallet paid the payment
    	self?.handleOtherPayment()
    case .disconnected:
    	// Handle the case if another wallet paid the payment
    	self?.handleDisconnected()
    }
  }
}
Example screenshots from our development application:

Business: Requesting Contactless Payments
Business users can send contactless payment requests via BLE to customer devices with a matching tag ID:
let tagID = UUID().uuidString // The service tag UUID to target

vipaso.payment.business.sendContactlessPaymentRequest(
    amount: "25.50",
    currency: "USD",
    paymentReference: "order-123", // Optional reference
    tagID: tagID
) { [weak self] result in
    switch result {
    case .success(let response):
    	self?.handlePaymentResponse(response)
    case .failure(let error):
    	self?.handlePaymentError(error)
    }
}
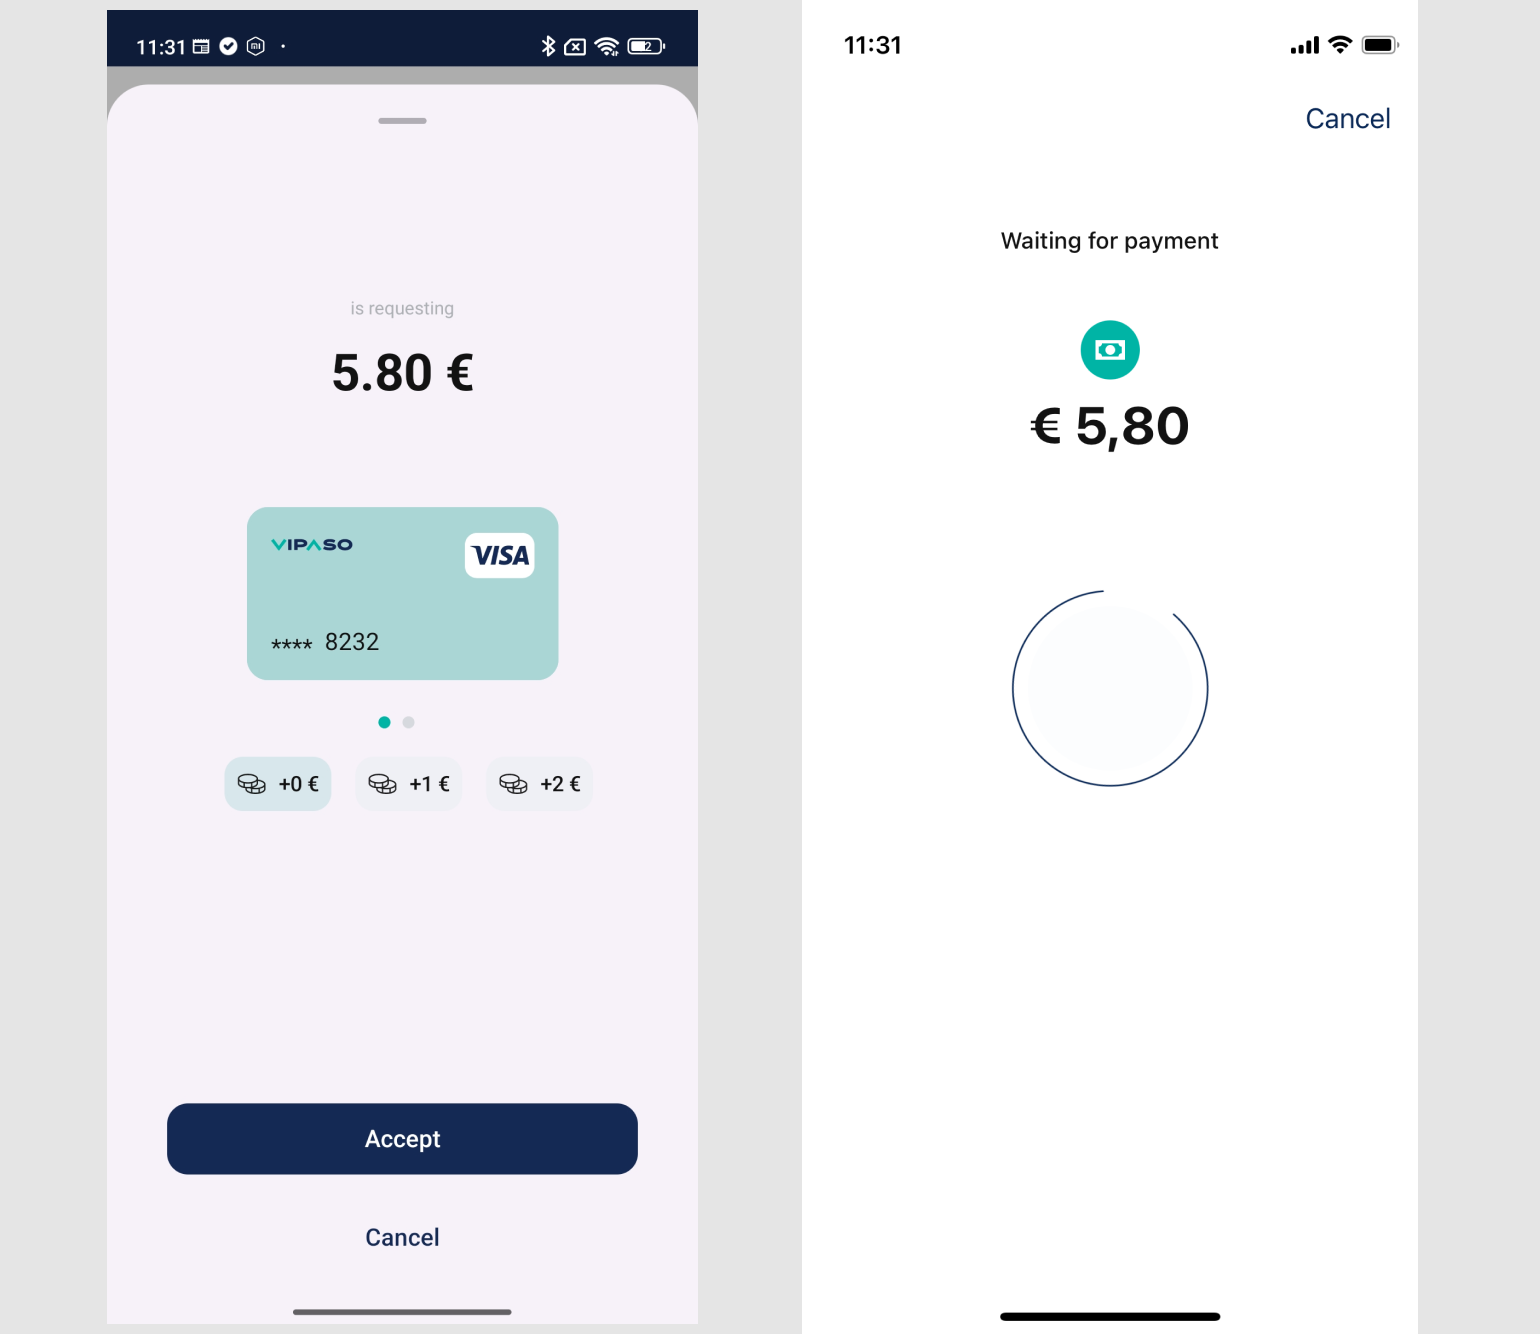
Accepting the Payment
With instruments managed by Vipaso
After the user has reviewed the payment details and selected a payment instrument, they can accept and execute the payment:
let request = VipasoPaymentAcceptanceRequest(
	paymentID: paymentID,
	amount: amount,
  tip: tip,
  currency: currency,
  instrumentID: instrumentID,
  createdAt: Date().iso8601String,
  isDelegatedInstrumentID: false // Set to true for delegated instruments
)

vipaso.payment.customer.acceptPayment(request: request) { [weak self] result in
	switch result {
  	case .success(let response):
    	self?.handleAcceptanceSuccess(response)
    case .failure(let error):
    	self?.handleAcceptanceFailure(error)
  }
}
With client Delegated instruments
The VipasoPaymentAcceptanceRequest.isDelegatedInstrumentID property also indicates if the payment is
being done with a delegated instrument.
let request = VipasoPaymentAcceptanceRequest(
    paymentID: paymentID,
    amount: amount,
    tip: tip,
    currency: currency,
    instrumentID: instrumentID,
    createdAt: Date().iso8601String,
    isDelegatedInstrumentID: true
)

vipaso.payment.customer.acceptPayment(request: request) { result in
    switch result {
    case .success(let request):
        promise(.success(request))
    case .failure(let error):
        promise(.failure(.generic(error: error)))
    }
}
NOTE: The acceptance method call is the same. Only the input model changes.
Example screenshots from our development application:
Cancelling the payment
Customer side cancellation:
With this call the customer indicates to the business user that the it does not pay the received payment. IMPORTANT: When this call succeeds the customer will not receive this payment from the business side anymore.
vipaso.payment.customer.cancelPayment(paymentID: paymentID) { [weak self] result in
  switch result {
    case .success(let response):
			self?.handleCancellationSuccess(response)
    case .failure(let error):
			self?.handleCancellationFailure(error)
  }
}
Business side cancellation:
With this call the business user indicates to all the connected customers that it cancels the payment so they can not pay it anymore. IMPORTANT: This is a fire and forget call.
vipaso.payment.business.cancelPayment()
Stop Receiving Payments
When you no longer need to receive payments, you can stop the payment reception:
vipaso.payment.customer.stopBLE()